Improving scapular mobility and correcting muscle imbalances that might prevent proper pull-up form is an essential step before teaching efficient pull-up or chin-up technique. After determining which shoulder limitations are present after learning how to assess shoulder mobility restrictions, the fitness professional can then work on correcting muscle imbalances.
The following mobility and strengthening exercises and drills will correspond with each movement restriction you have determined is a problem for your client and may be done in succession.
Release and Stretch Anterior Tippers of Scapulae
If your client has elevated shoulders that also round forward, the levator scapulae and pectoralis minor muscles will need to be released and lengthened.
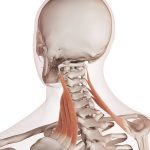
Levator Scapulae
Release Levator Scapulae
-
- Find the superior angle of the scapula.
- Take a massage or lacrosse ball and place it just medial to that angle.
- While holding the ball, back into a wall with knees slightly bent so you can control the placement of the ball by moving through the lower body (if needed).
- With head tilted slightly towards opposite shoulder and looking down towards the chest, allow arm of the side being released to reach down towards the floor and somewhat behind the body (Drawing the shoulder blade down the back).
- Allow ball to rest on trigger point for 30-120 seconds until a release is felt.
- This is a stubborn spot! Breathe and try to relax.
- Another trigger point is located approximately 1-2 inches superior to this spot and slightly medial. Maintaining the same posture, allow the trigger point to release under moderate pressure from the ball.
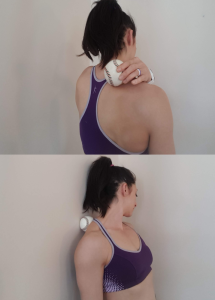
Self Release of Levator Scapula
An active release may be attempted if the above does not produce desired release:
- Allow arm to abduct to no higher than shoulder height or until tenderness intensifies.
- Return to start and repeat slowly 10 times until a release is felt.
Stretch Levator
- Assume a similar posture as the release above: tilt head so ear is reaching towards the shoulder, then look down slightly towards your chest. Keep chin tucked.
- Opposite side arm will be reaching towards the floor and slightly behind the body.
- Use the hand on the side head is tilting towards to pull gently on the top of the head to intensify the stretch.
- Hold for 30-60 seconds.
- To intensify, make the stretch active by abducting the straight arm and raising to 90 degrees.
Release Pec Minor
This is a tricky muscle to locate and release. It lies beneath the pec major and attaches from the dorsal 3rd-5th ribs to the coracoid process of the scapula.
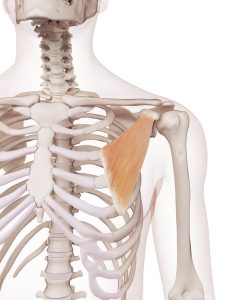
Pectoralis Minor
- Find the natural depression just medial to the anterior deltoid and inferior to the clavicle. Beneath that depression is the coracoid process where the pec minor inserts. Follow the fibers downward and diagonally towards the midline of the body about two inches.
- Gently palpate this area for tenderness. Raise the arm to move the pec major fibers and elongate the pec minor.
- Place and hold the ball on the most tender area and lay prone on the floor pinning the ball with the chest.
- Reach the arm overhead and let it relax to the floor as a trigger point is located.
- Hold the ball on the most tender spot for 30 seconds or until a release is felt.
- Repeat on opposite side.
Stretch Pec Minor
Statically stretching the pec minor is even trickier than releasing it. Because of the risk of shoulder impingement, the most effective pec minor stretch position is also the most likely to cause pain or injury. A safer way to instruct clients to statically stretch the pec minor is the following:
- Lie on a half foam roll, or a thick, rolled up towel so that spine is slightly elevated and the shoulders can make reach for the floor.
- With palms up and shoulders in external rotation actively press shoulders towards the floor.
- Maintain the position for at least 1-2 minutes.
- To intensify, the arms may reach overhead in a wide “Y” position, palms up and arms relaxing towards the floor.
- Again, maintain this position for at least 1-2 minutes or until a release is felt.
Release and Lengthen Downward Rotators of Scapulae
The rhomboids, levator scapulae, and pec minor all contribute to downward rotation of the scapulae. The latter two were addressed above.
Release Rhomboids
- Start seated on floor with knees bent and feet flat on floor.
- Place the foam roller on floor behind hips and perpendicular to spine.
- Lie back on foam roller so that it is centered on thoracic spine at top portion of scapulae.
- Place hands behind the head, elbows pointed towards ceiling.
- Roll up slightly, engaging the abdominals.
- Rather than stay centered, roll slightly to one side so that foam roller is compressing the soft tissue of rhomboids between spine and scapula.
- Allow 30-60 seconds for tenderness to dissipate and roll body upward and foam downward to locate a lower trigger point.
- Repeat on opposite side.
Stretch Rhomboids
- Assume child’s pose position for most optimal rhomboid stretch.
- Kneeling on floor, fold over knees with arms outstretched overhead, palms on floor.
- Spread scapulae while keeping chin tucked and forehead down.
- Hold stretch for 30-60 seconds.
Strengthen Posterior Tippers and Upward Rotators of Scapulae
The serratus anterior and trapezius muscles are responsible for depressing the scapulae into the rib cage and for upwardly rotating them, gliding the inferior borders of the scapulae laterally as the arms raise.
Supine Floor/Wall Shoulder Flexion (Thumbs, fist, flat hand):
This is an ideal method to activate the serratus anterior without involving the pec minor.
- From hook-lying position on the floor, place closed fists with thumbs up on top of thighs.
- Keeping elbows straight and shoulders depressed (cue the client to keep shoulders down) extend arms overhead with the goal of reaching the floor with the thumbs.
- Lumbar spine should stay flat on the floor, or at least not overextend.
- Hold end position for 3-5 seconds and repeat 12 times.
- Advance by reaching for floor with closed fist, then back of flat hand.
- Once this is mastered on the floor, attempt it standing against a wall and progressing from there.
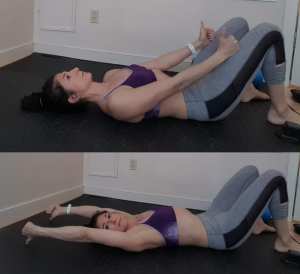
Floor Angels
Once the above is mastered, move on to floor angels:
- From hook-lying position, place back of hands on floor with shoulders and elbows at 90 degrees.
- Initiate an “overhead press” by reaching hands straight overhead while arms and back of hand glides across the floor.
- Repeat 10-15 times.
- When mastered, perform movement standing against a wall ensuring head, shoulders and hips stay against the wall.
Check out this Wall Angel exercise once the above basic wall angels are mastered and keep it as a regular warm-up exercise.
Advanced Wall Foam Roll-Up
Attempting to roll the foam up the wall adds resistance, effectively strengthening the serratus anterior and trapezius muscles.
- Place a foam roller horizontally on a wall about chin height.
- Hold foam roller in place with wrists by flexing arms and elbows to 90 degrees and keeping hands neutral.
- Slowly roll the foam up the wall without elevating the shoulders until arms are straight.
- Slowly return to start.
- Repeat 10-15 times.
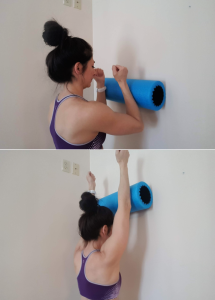
Wall Foam Roll Up
Floor Cobra:
To target the lower trapezius perform and progress the cobra, starting on the floor with a foam roller or thick towel placed under the sternum.
- Start prone on long foam roller supporting sternum and pubis. Foam roller should not be under face.
- Start with arms abducted about 30 degrees, palms down on floor.
- Keeping chin tucked, lift arms off of floor reaching fingertips towards feet and keeping shoulders depressed.
- Arms should not lift higher than the torso. Focus on pressing scapulae into the ribcage.
- Repeat 10-15 times.
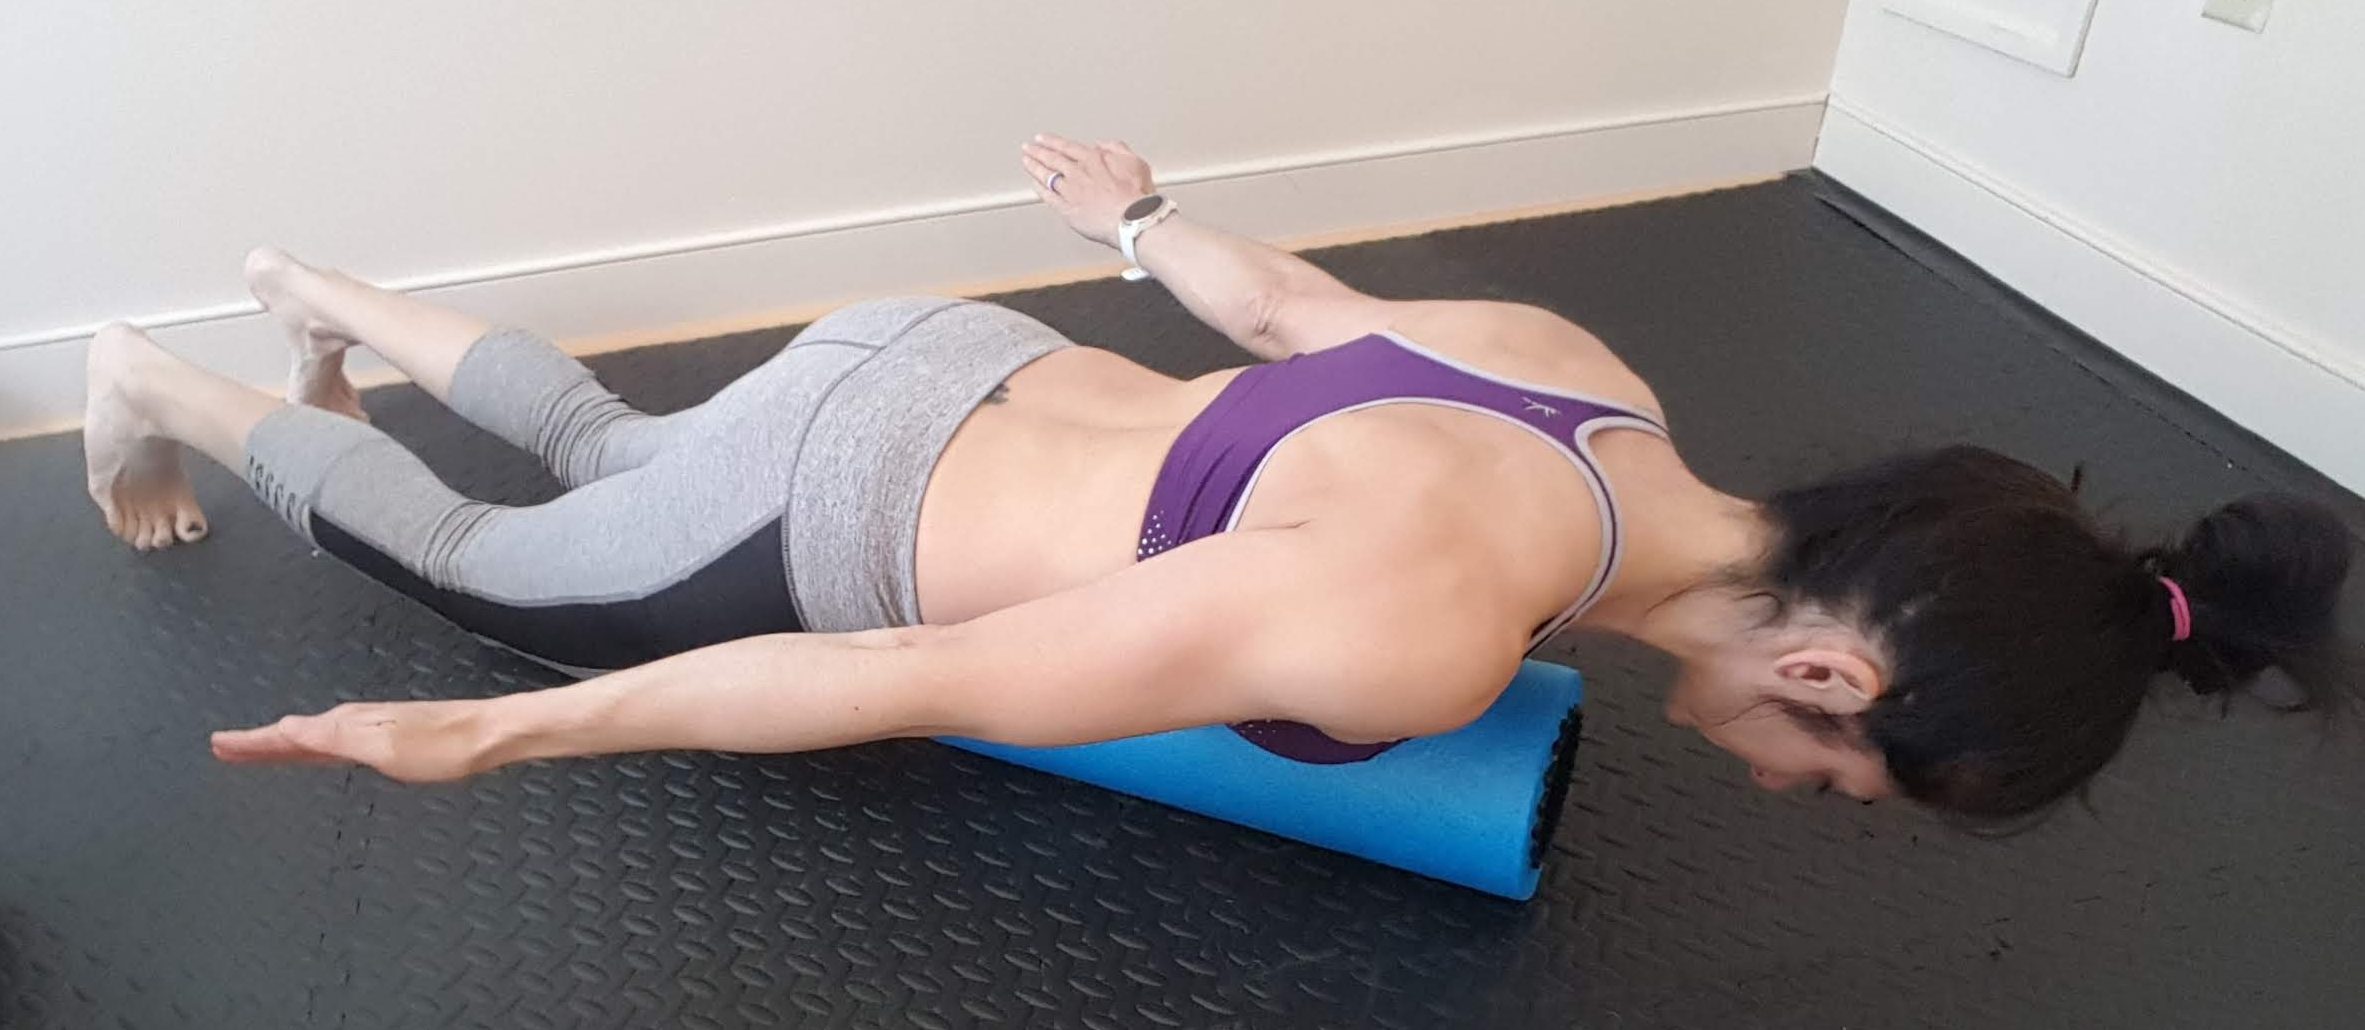
Floor Cobra on Foam Roll
Moving Forward
Program the above scapular mobility exercises for at least two weeks and note if progress is made. Once mobility has improved so that initial assessments are passed, (thoracic mobility should be addressed first) the client can move on to improving any other restrictions in shoulder mobility, such as an imbalance in internal and external rotation at the glenohumeral joint.
NFPT Publisher Michele G Rogers, MA, NFPT-CPT and EBFA Barefoot Training Specialist manages and coordinates educational blogs and social media content for NFPT, as well as NFPT exam development. She’s been a personal trainer and health coach for over 20 years fueled by a lifetime passion for all things health and fitness. Her mission is to raise kinesthetic awareness and nurture a mind-body connection, helping people achieve a higher state of health and wellness. After battling and conquering chronic back pain and becoming a parent, Michele aims her training approach to emphasize fluidity of movement, corrective exercise, and pain resolution. She holds a master’s degree in Applied Health Psychology from Northern Arizona University. Follow Michele on Instagram.
